
Omega Arms Chest Press
I think the video says it all - so I will keep this short.
Hopefully I was successful at conveying that setup can take 30 seconds or less if you store the Omega Arms in “Temporary Storage mode” with your preferred handles already in place.
Bracket Orientation
The ideal pitch of the Omega Arms will be different for everyone. Some bodies are smaller/larger than others - so how you fit inside the “rig” will be different for everyone. The good news is that The Omega Arms are fully customizable. Therefore, you should experiment with different options.
The placement of the brackets will dictate the pitch of the Omega Arms. So in order to find your perfect pitch, experiment with putting the brackets on the back of the rear uprights and the front of the rear uprights. Further, experiment with the height of the brackets as well as the orientation of the brackets to place the 3/4” hole (the 3/4” LATERAL hole which the 3/4” 60” nipple is inserted through) in the upper right, upper left, lower right, or lower left of the brackets when looking at the bracket from the side view). All this will dictate the pitch of the Omega Arms. I thought that this topic might be boring/ confusing for most viewers- which is why I excluded the topic from the video.
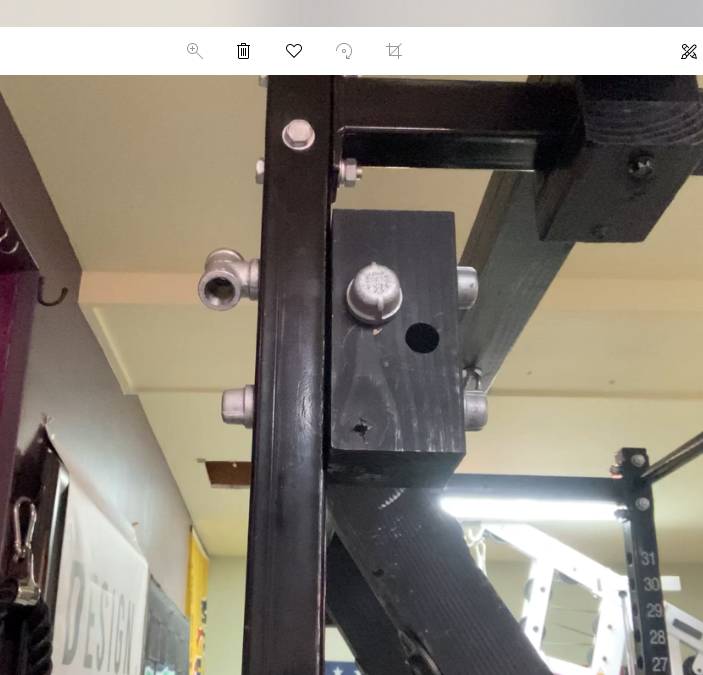
In the video I have the bracket in this orientation (see picture below). I have the brackets on the FRONT of the rear uprights, at the very top of the uprights (where the 60” nipple is 72” from the ground), and the 3 / 4” lateral hole is the “upper left” position. Therefore, if I moved the bracket to the rear of the upright, and/or lowered it, and/or rotated the bracket vertically / horizontally — I would have a different pitch. Experiment with it!
Shopping List
WHEN SHOPPING, PLEASE CLICK FIRST TO SUPPORT THE CHANNEL: By shopping with Amazon via any of these links, I get paid a small commission which helps support the Club’s costs such as Web Hosting the website.
Power Rack https://amzn.to/3dUvUed
1 1/2 Schedule 40 PVC
1 1/ 4” Schedule 40 PVC
1” Schedule 40 PVC Couplers
3 / 4” Floor Flange: https://amzn.to/3klvoIk
3 /4” x 6” Long Nipple: https://amzn.to/3lKcwnb
3 / 4 x 10” Long Nipple: https://amzn.to/3hT277G
3 / 4 x 12” Long Nipple: https://amzn.to/3CxlFpR
3 / 4 x 60” Long Nipple: https://amzn.to/3i5zB2x
3 /4” Nipple Cap: https://amzn.to/3CzkxlO
3 /4” Nipple Tee Connector: https://amzn.to/3hQD0Cw
1 /2” 6” Long Nipple: https://amzn.to/3i3lcUC
1 / 2” Nipple Cap: https://amzn.to/3lYgTuR
1 /2” Tee Connector: https://amzn.to/3lVFgcI
Pipe Wrench: https://amzn.to/3CNcTV9
Once you try this for yourself - be sure to let me know how it worked for you! Happy Lifting!
SHOUT IT OUT: If you Build this project and want to brag about it, please use the #DesignBuildLift hashtag so that I can feature your amazing creation on my social media to help inspire others!